- 06 Mar 2025
- 1 Minuto para leer
- Impresión
- OscuroLigero
- PDF
ScreenMeet Beam + ServiceNow Installation
- Actualizado en 06 Mar 2025
- 1 Minuto para leer
- Impresión
- OscuroLigero
- PDF
Overview
ScreenMeet Beam has been integrated into ServiceNow as it's own application.
Installation
The ScreenMeet Beam application can be installed using the following link.
https://docs.screenmeet.com/v1/docs/finding-screenmeet-in-the-servicenow-store-1
Adding a Beam Group
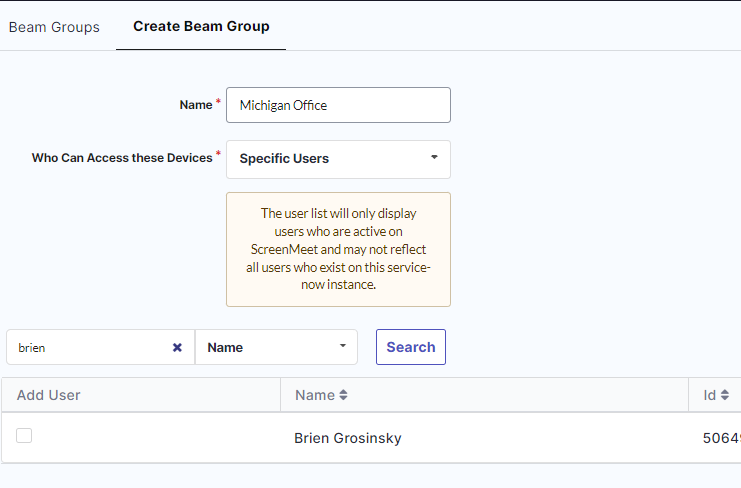
Navigate to the Beam application, once installed, inside of ServiceNow and click on "Create Beam Group".
You may create Beam groups based on geolocation or other specific targeting behavior.
These Beam groups can have varied permissions, such as specific agents only being able to access a given group.
 When creating the Beam Group, you will be prompted to name it and select who can access the devices contained within the group.
Who Can Access these Devices:
- Specific Users: This will provide you a list of users that have the appropriate role and have either loaded the ScreenMeet component in ServiceNow or logged in via console.screenmeet.com. If your user has the correct role but has not done either of the other steps, they will not show up in your list of users to add
- Organization Administrators Only: All ScreenMeet Administrators
- All Agents: All active ScreenMeet users


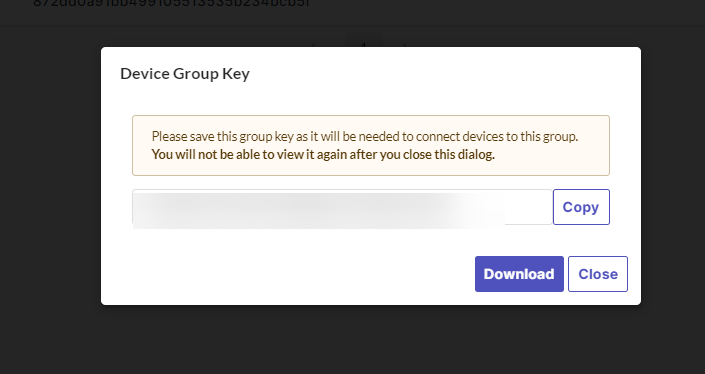
A Beam Group key will be provided - this is used to bind the installed application on the machines to this given group.
You will want to save or document the key to use it as part of the machine installation process later.
- You can locate this group key later by logging into console.screenmeet.com > click Beam Groups > click on the appropriate beam group > the Group Key will be located in the top right.

Installing Beam on Windows/Mac
For instructions on installing the client on the desired machines, please follow the documentation below
https://docs.screenmeet.com/docs/screenmeet-windows-beam-installing-the-beam-client-to-a-device
https://docs.screenmeet.com/docs/installing-the-macos-beam-client-to-a-device
https://docs.screenmeet.com/docs/deploying-beam-on-windows
https://docs.screenmeet.com/docs/deploying-beam-on-mac
https://docs.screenmeet.com/docs/screenmeet-beam-changing-beam-settings-on-a-device
.png)
