Using Screen Annotation
Introduction
This article explains how Agents enable and use the Screen Annotation feature to guide end users during remote support sessions.
Requesting Screen Annotation
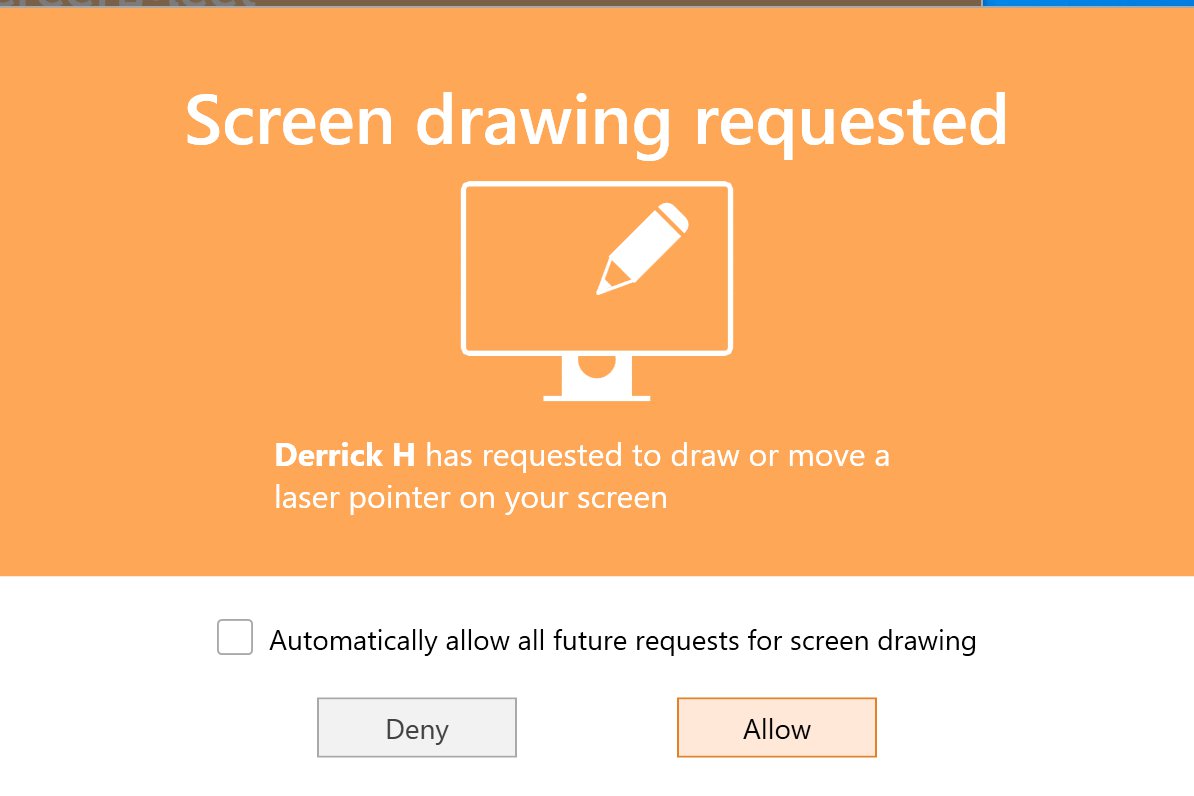
Agents can use their mouse as a laser pointer on the end user’s device. Click Request Screen Annotation to begin.

A request is sent to the end user’s device, and the button state changes:

Enabling Screen Annotation
Once the end user clicks Allow, Screen Annotation is enabled. While active, the Request Remote Control option becomes unavailable.
Using Annotation Tools
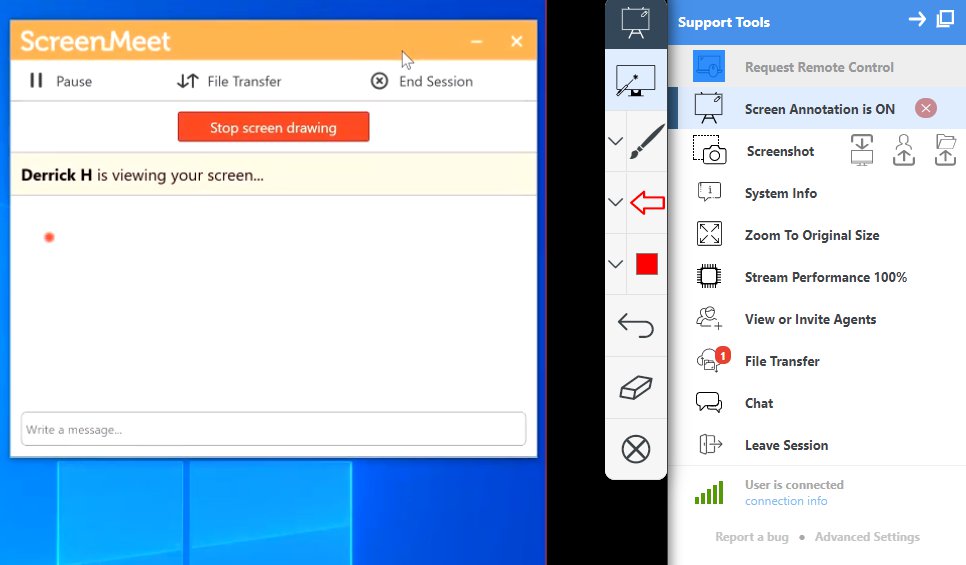
Agents can use the mouse to indicate tap locations on the user’s PC or macOS device. Clicking the mouse enlarges the laser pointer. Additional annotation tools include brush mode, shapes, and color selection.
To disable Screen Annotation, click the red X on the right-hand side.

End User Controls
End users can also stop Screen Annotation at any time by selecting Stop Screen Drawing in the ScreenMeet application.
Conclusion
Screen Annotation provides a simple visual guidance tool, enabling Agents to assist end users more effectively during support sessions.