Application Tab
- 16 Oct 2021
- 1 Minute à lire
- Impression
- SombreLumière
- PDF
Application Tab
- Mis à jour le 16 Oct 2021
- 1 Minute à lire
- Impression
- SombreLumière
- PDF
The content is currently unavailable in French. You are viewing the default English version.
Résumé de l’article
Avez-vous trouvé ce résumé utile ?
Merci pour vos commentaires
You can add ScreenMeet Live Sessions as a tab to any Salesforce application. Users will be able to review historical session data as well as create and schedule new sessions from the tab. This is an optional configuration.
- Sign in as a System Administrator, then go to Setup.
- Type "app manager" into Quick Find.
- Click on App Manager from the search results.
- Choose the app to which you will add the tab. For this example, we will use the "Service Console Lightning" app.
- Click the options dropdown for the app you wish to edit and click edit.

- Open Navigation Items from the menu on the left.
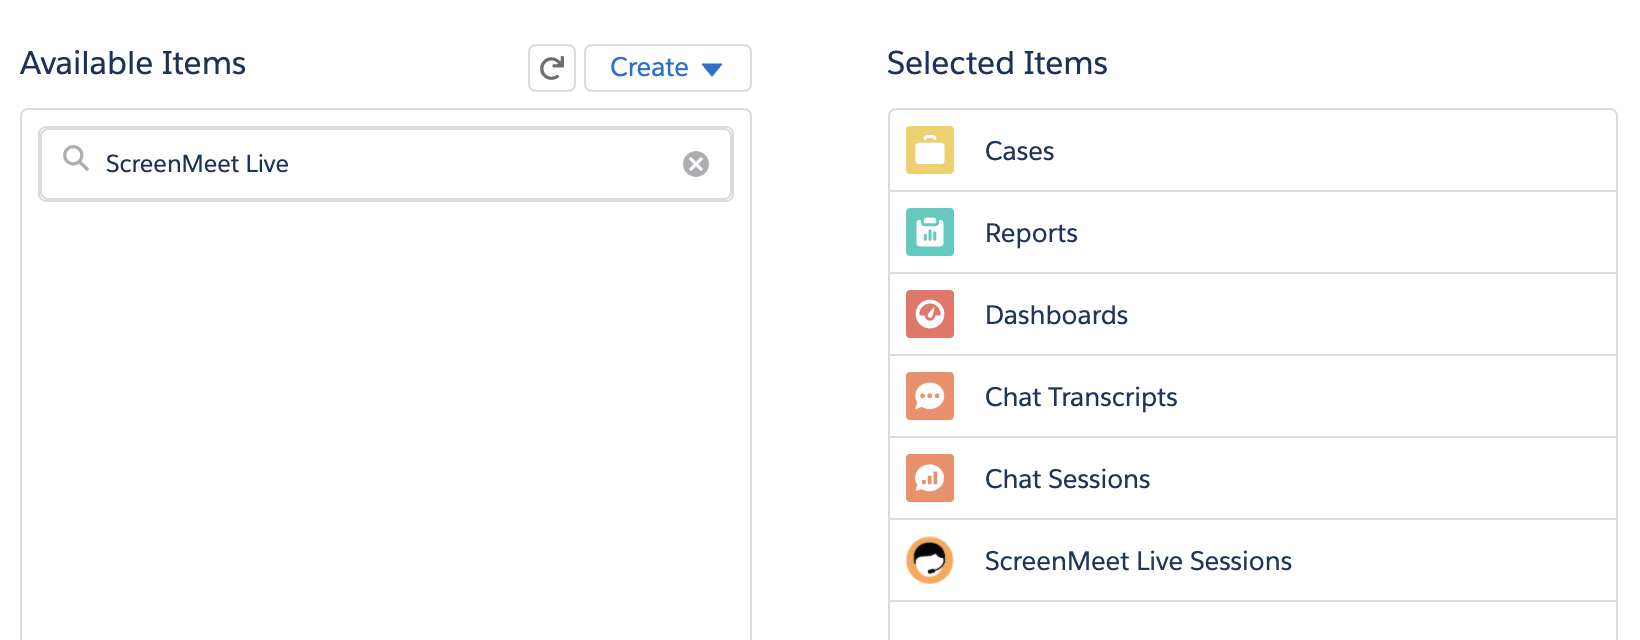
- Find and select "ScreenMeet Live Sessions" in Available Items. Use the arrow to add it to Selected Items.

- Click Save.
- To add to a Classic App menu, click Edit for the Classic app from the app list.
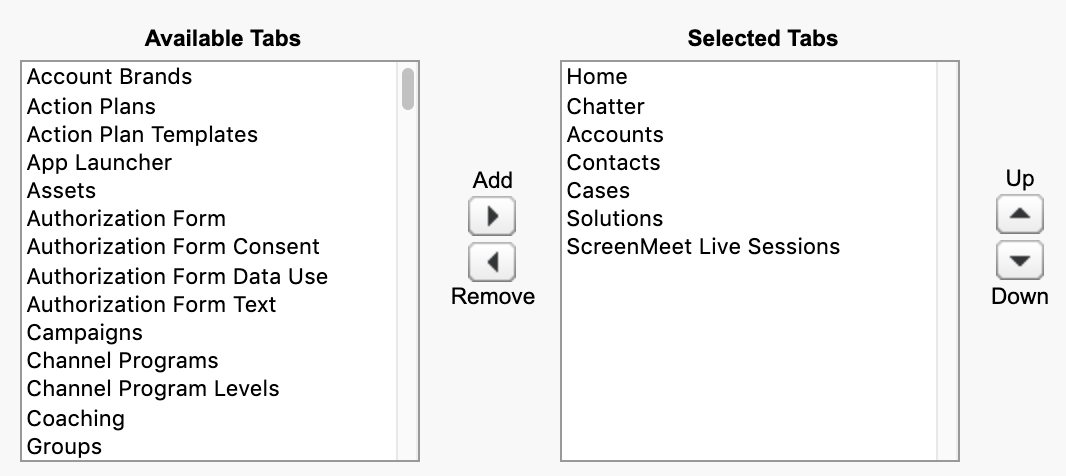
- Find and select "ScreenMeet Live Sessions" in Available Tabs. Use the arrow to add it to Selected Items.

- Pick the profiles to which you wish the tab to be assigned below.
- Click Save at the bottom of the page.
Cet article vous a-t-il été utile ?
.png)
