The information provided below relates to the desktop/web based version of the Live platform.
After reading this article, an agent should be able to navigate through a session and guide participants on relevant settings/behavior of the application.
Pre-session lobby
Upon joining the Live meeting link, you will be greeted with the pre-session lobby.
Provided below are the different settings that are used throughout a given Live session that can be setup prior to joining the call.
Microphone settings
- Clicking on the Microphone icon allows you to mute/unmute your microphone prior to joining the session.
- This also will ensure you have given the web page the proper permissions to access your microphone.
- Once your microphone has been enabled, you should be able to speak and see the background of the microphone icon visually rise with the level of your voice
Camera settings
- Clicking on the Camera icon allows you to enable your webcam before joining the session.
- You may be asked by your browser to give access to your camera. Click "Allow" or permit the camera based on your browser when/if you are prompted to.
- Upon enabling your camera, you should see a preview of what will be shown in the meeting.
Background settings
- Clicking on the background icon allows you to set a virtual background for your camera.
- By default, background blurring will be an option that can be selected. This will effectively blur the background of the environment to focus on the individual in the session.
- If your organization administrator has uploaded custom backgrounds, they will also appear within this section as an option.
Settings gear/cog
- The settings gear/cog icon allows you to individually set your input/output/peripheral settings properly.
- If you would like to use a different camera, microphone, or output method(speakers, headphones, etc), click on the settings gear and select the desired settings.
Session settings/functionality
Once you have entered the session, similar settings/functionality to those referenced above will be visible. Functionality within the call/meeting is documented below.
For information purposes, the settings below are listed in the order seen within the ScreenMeet Live session from a left -> right perspective.
- Information button: Clicking on this button at the bottom left of the session will show you the meeting ID, description of the meeting, and the URL of the meeting that can be shared.
- Full screen button: Clicking on this button will maximize the live meeting and hide your browsers top tool bar. Pressing the "ESC" key will revert this setting.
- Microphone button: Clicking on this button will mute/unmute your microphone.
- Camera button: Clicking on this button will enable/disable your webcam.
- Screenshare button: Clicking on this button will allow you to share your screen. Once clicked, you can decide to share one of the following options:
- Entire screen - allows you to select which screen to share if you have multiple monitors
- Window - allows you to select a particular application that is currently visible within your computer.
- Chrome Tab - allows you to selectively share a given Chrome Tab
- Once screensharing has been enabled, re-clicking on the screenshare button will allow you to switch the source or stop the screen share.
- Toolbar button(three vertical dots): Clicking on this button allows you to quickly reference the following session settings/session information
- Meeting information, active speaker layout(highlights/shows the person currently speaking), chat toggle, full screen toggle, background blurring settings, video settings, audio settings, people(show participants in meeting), other sessions(create child sessions), start recording.
- Hang up button: Clicking on this button will allow you or participants to leave the meeting. If you are the agent/owner of the session, it will allow you to close the meeting as well.
- Participants button: Clicking on this button allows you to view all participants of the session.
- Chat button: Clicking on this button allows you to view the chat of the session. Inside of this chat, you can converse via text with participants and also send files.
- Settings button: Clicking on this button opens the settings pane. Relevant settings in this pane are listed below
- Approve requests to join: requires participants to be admitted to the session by the agent/session owner
- Record this meeting: allows the session owner/agent to enable recording
- Follow Active Speaker: this setting changes the layout behavior to always display the users webcam/name of the person that is currently speaking in the session.
- Language: this setting changes the localized language of the text inside of the session settings/buttons/etc.
- Audio: allows the user/agent to change their microphone/speaker
- Video: allows the user/agent to change their camera and stream resolution.
- Background: allows the user/agent to change their virtual background for their camera.
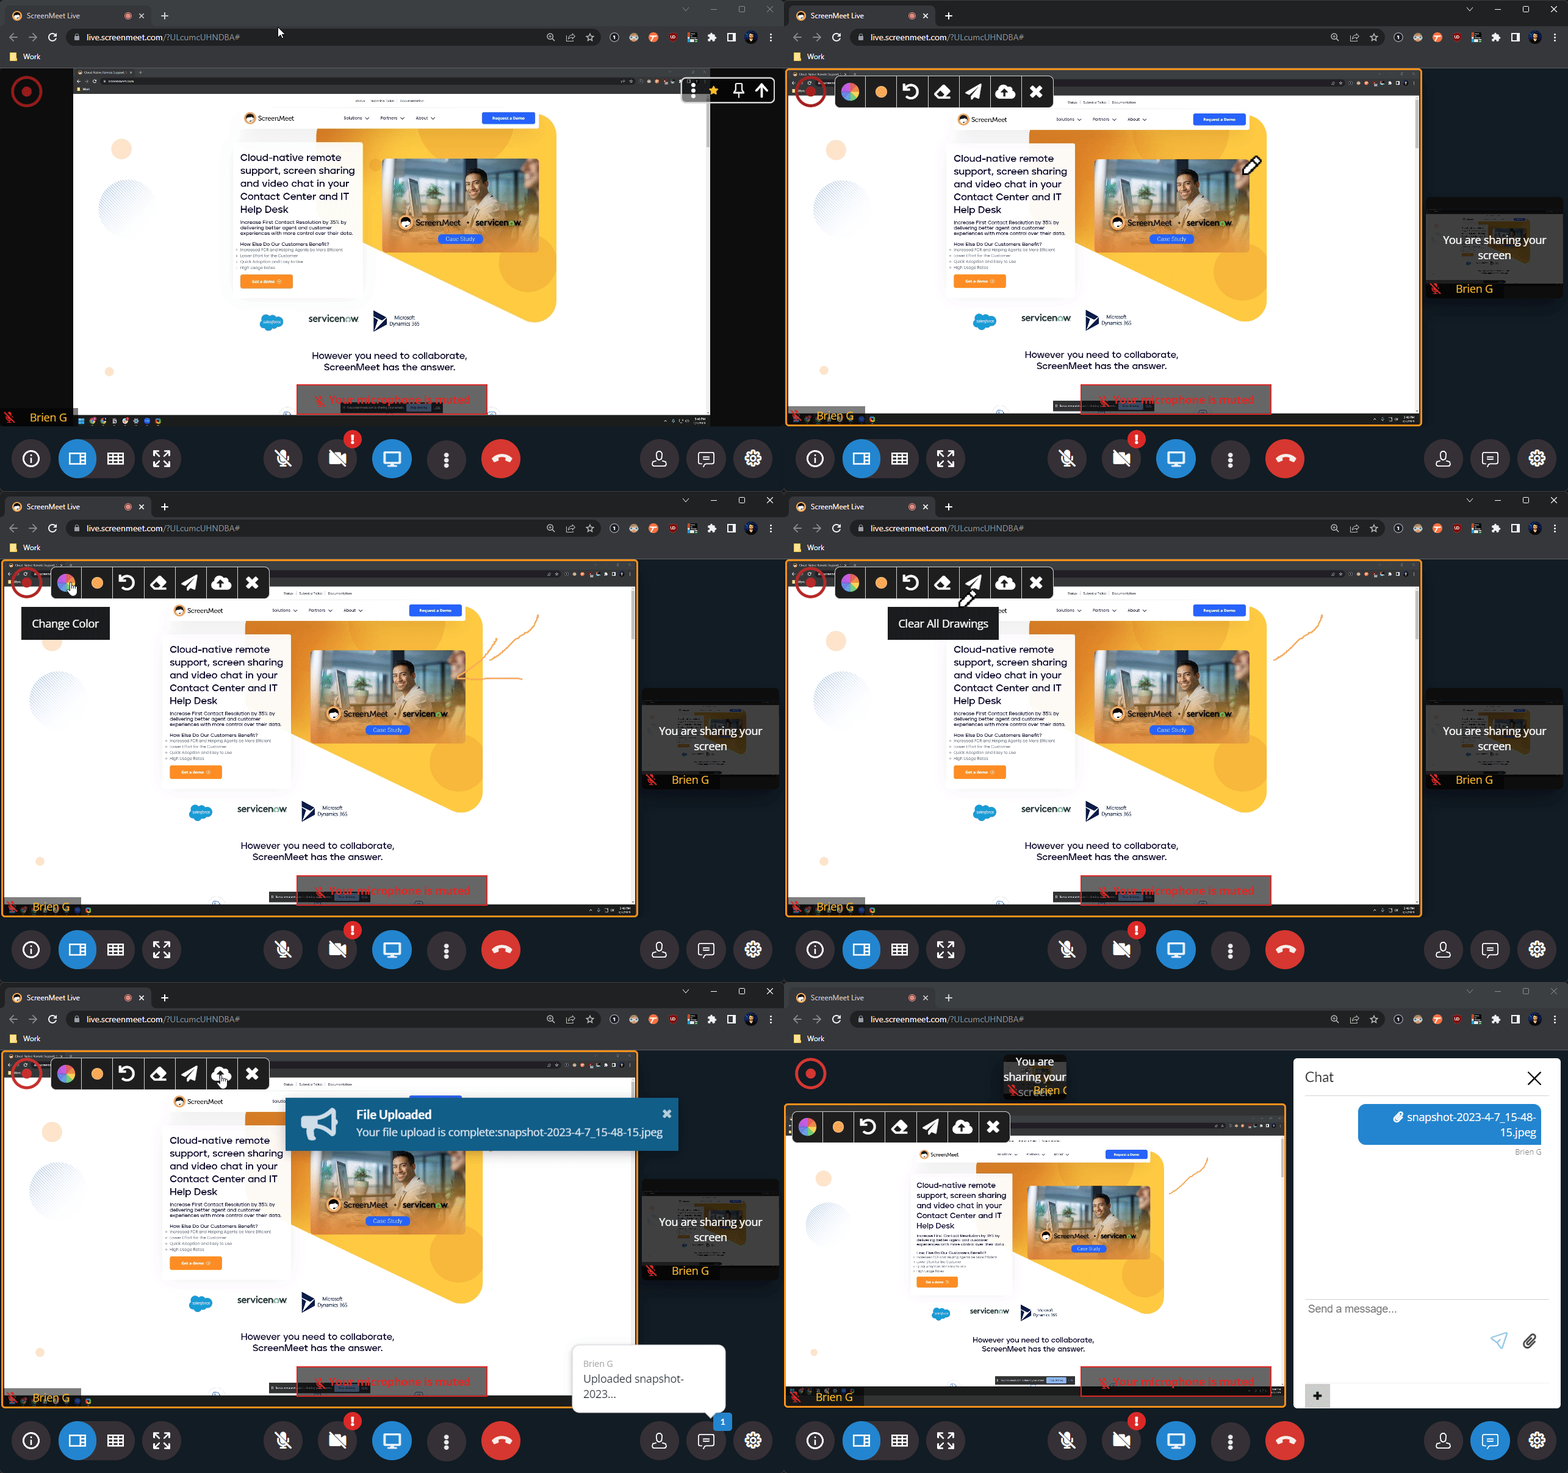
- Snapshot button: Upon enabling the snapshot functionality, an annotation icon(pencil) will appear.
- When enabled, this will allow the agent to use their cursor to click/drag to draw over what is currently being presented which will be visible to all session participants.
- The agent can take a screenshot using the screenshot option in the toolbar which can be sent to the customer/end user via the chat or to the CRM case.

Idle time out:
- This setting is not configurable, though for information purposes, the idle timeout within Live is 30 minutes.
- If there is no session activity, users will be prompted with a popup shortly before the idle time out expiration if they would like the session to continue.