- Create a Remote Support session and connect the end user's device.
- Enter the viewer. If you intend to use Agent mode, establish Remote Control through the normal session workflow.
- Open AI Assist from Support Tools. The header shortcut's tooltip is Open AI Assist.
- Wait for Initializing AI agent... to finish.
- Describe the symptom, the scope, and what you want checked. State restrictions such as “read-only checks only” or “do not restart the application.”
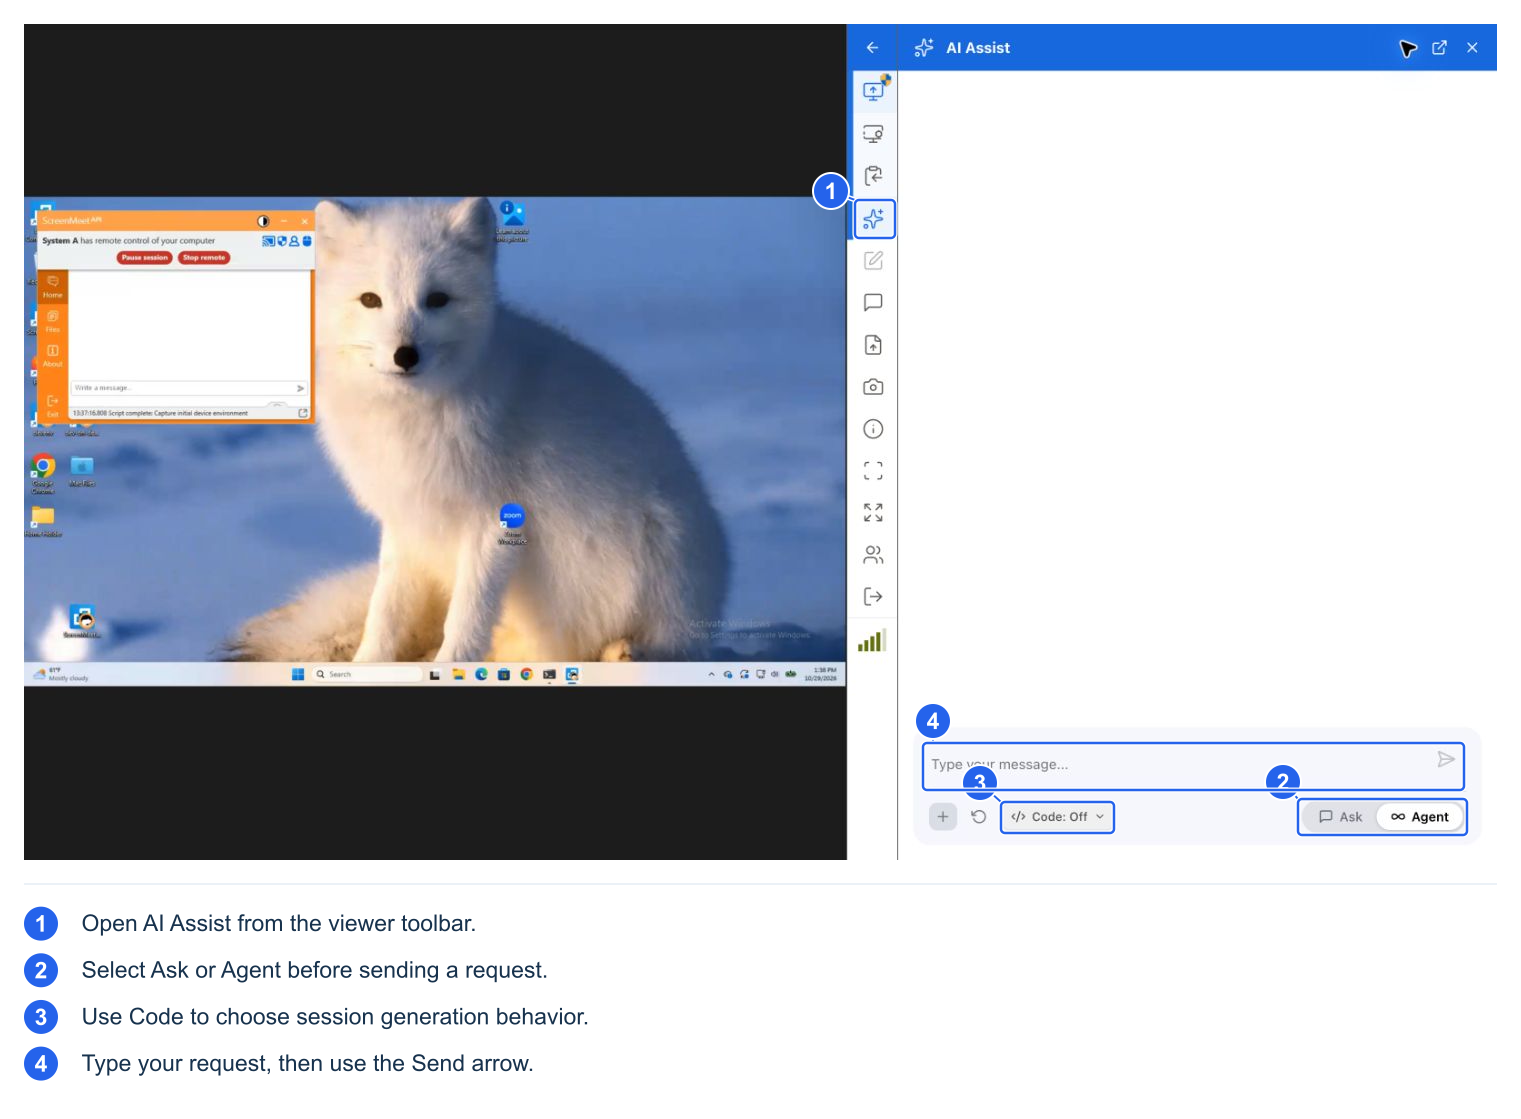
The live Windows walkthrough. The Code menu starts at Off even though this example organization allows generated scripts.
Administrator access is not required just to start using Agent mode. A standard session can run user-role tools. If a necessary operation requires administrator access, the inline flow in section 6 handles it.
Useful first requests include:
- “The internet drops intermittently. Start with read-only network checks.”
- “This laptop shuts down unexpectedly. Check its battery and relevant shutdown evidence.”
- “The user saw a blue screen yesterday. Check what crash evidence is available.”
- “Explain this error and tell me what evidence would distinguish the likely causes.”
Give the agent the actual problem. If several printers, devices, processes, or packages could be the target, expect it to ask you to choose. Do not approve a change while its target is unclear.
Composer controls. Enter sends a message; Shift+Enter inserts a new line. Stop generation replaces Send while a turn is active. Start over clears the conversation's working context; it does not undo completed device operations. The panel can be undocked and docked through the viewer's toolbar controls.