This article provides information on using certificates to ensure only approved devices can connect to ScreenMeet Remote Support.
Supported on both Windows and macOS devices. The Remote Support client for macOS must be version 3.115.1544 or higher.
What is Certificate-Based Device Validation?
This is an enhanced security feature built into our ScreenMeet Remote Support Client for Windows. When enabled, this feature will cause the service to reject any incoming requests from endpoints without the appropriate certificate installed, thus preventing any unmanaged Windows clients from connecting to your organization's ScreenMeet Remote Support services.
When should you use Certificate-Based Device Validation?
If you would like to restrict access to your ScreenMeet Remote Support service to specific Windows endpoints that are managed by your organization. These are typically endpoints managed by an MDM solution that can install/manage certificates on the endpoints.
How to configure Certificate-Based Device Validation
Issue and install certificates on managed devices that should be allowed to connect to the ScreenMeet Remote Support service (This is typically done by your IT Administrator)
Decide on a Issuer Common Name to use for the certificate. This is the name that will be:
specified in the issuing certificate (pem)
encoded in the certificate (p7b) as part of the Issuer name during issuance
configured in the ScreenMeet Portal as a filter to be used during certificate validation
Issue the device certificates for your managed devices
Using your trusted issuing certificate (
pem), issue the device certificates for your managed devices. This is typically done by your IT organization
Install the certificates on your managed devices
This is typically done by your IT organization through an MDM tool. If doing this manually, follow the steps below:
Install on a Windows device:
Distribute the device certificates (
p7b) to your managed devicesOpen the
p7bfile to open the certificate containerLocate the actual device certificate for installation
Double-click on the actual device certificate
Click the
Install Certificate...button to open the install wizardSelect the option for installing for the
Local MachineClick the
InstallbuttonLet the wizard automatically select which certificate store and click the
FinishbuttonYou should see a dialog specifying that
The import was successful
Install on a macOS device:
Distribute the device certificate to the macOS device (commonly provided as a .cer, .crt, or .p12 file).
Open
Keychain Accesson the device.Select the
Systemkeychain from the left-hand pane.If prompted, authenticate with administrator credentials to make changes.
Drag and drop the certificate file into the
Systemkeychain, or double-click the certificate and selectSystemwhen prompted for the keychain location.Confirm the certificate appears under
System→Certificates.If required, open the certificate and ensure it is trusted appropriately.
Verify the certificate is installed on your device
Note
The location where your certificates are installed on your device may differ from this example. Please contact your IT Administrator to verify your certificate installations if needed.
For this functionality to work properly in escalated scenarios, the certificate needs to be installed for the local machine and NOT just for the local user.
To check a certificate on a Windows device:
On your Windows device, open the certificate manager by searching for the tool
Manage Computer Certificates, opening this tool should open a window showing theCertificates - Local ComputerNavigate to
Other People-->Certificatesto see the default location where these certificates are installedConfirm that your certificate is installed in the listing
To check a certificate on a macOS device:
On your macOS device, open
Keychain Accessby using Spotlight Search (Command + Space) and searching for Keychain AccessIn Keychain Access, select the
Systemkeychain from the left-hand panel, then selectCertificatesunder the Category sectionReview the certificate list and confirm that the expected certificate is present and issued by the correct certificate authority
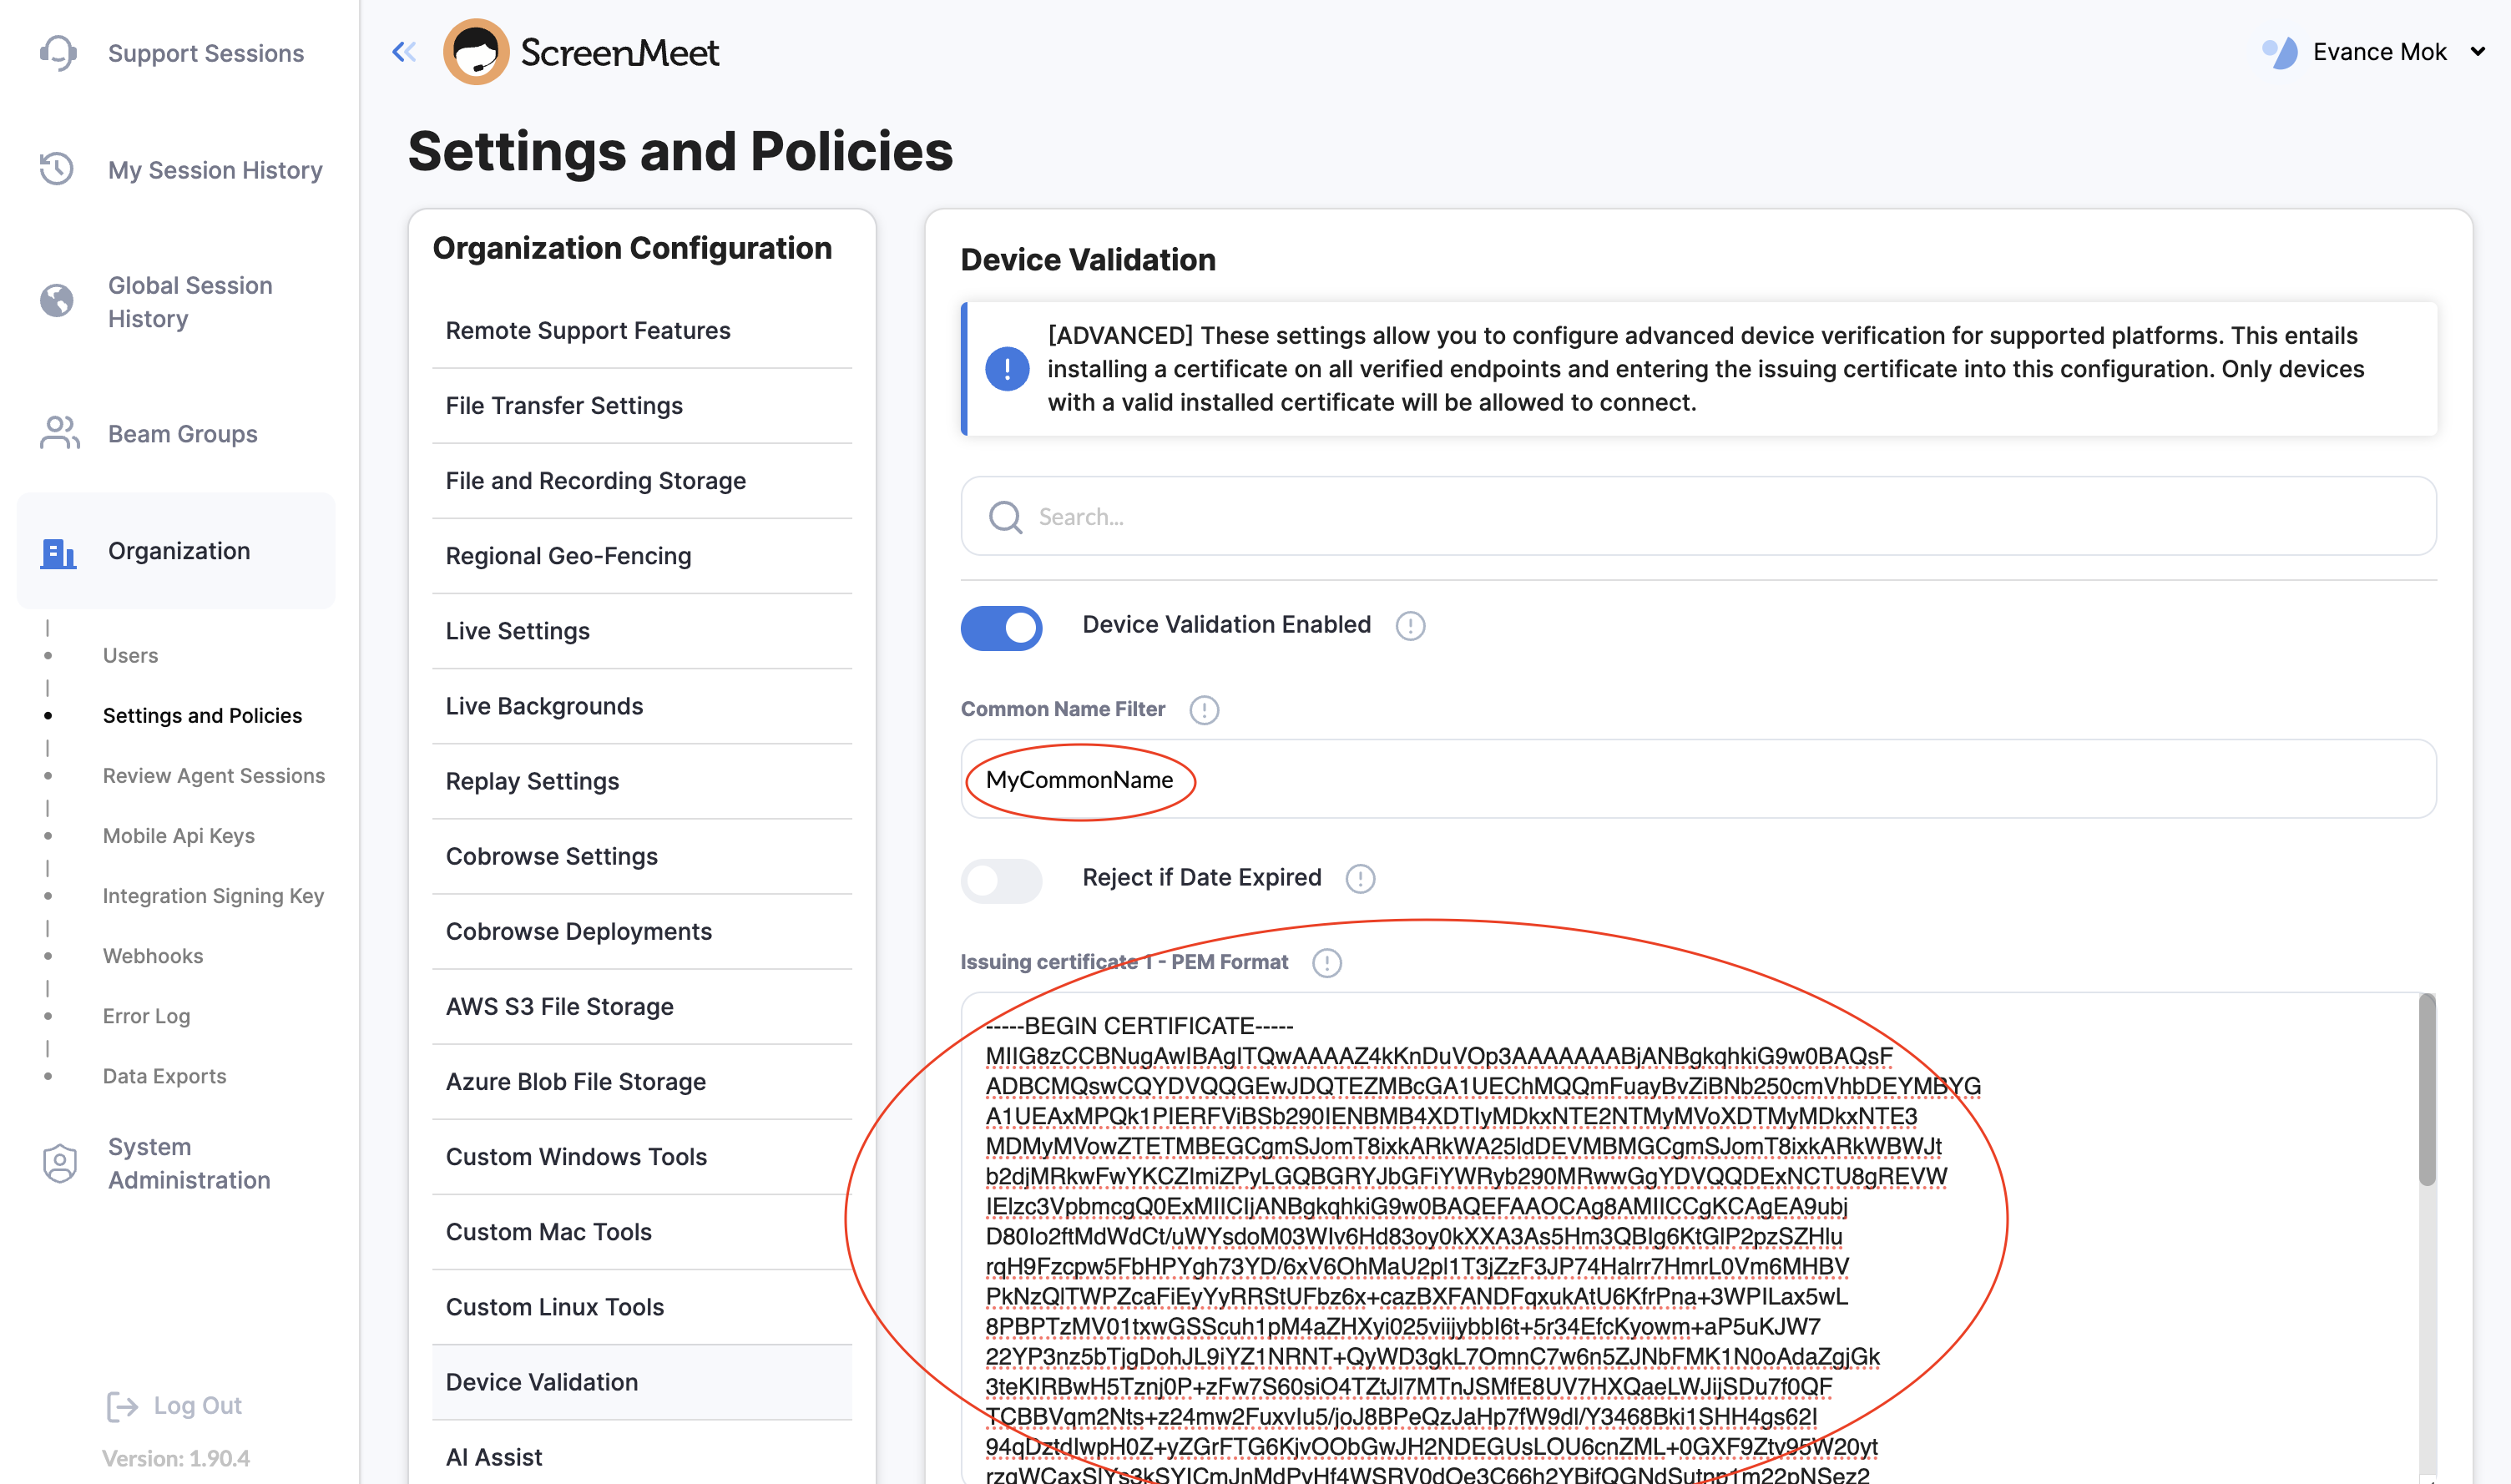
Enable this feature this in the ScreenMeet Portal
Login to console.screenmeet.com as an administrator
Navigate to
Organization-->Settings and Policies-->Device Validation
.png)
Enable the
Device Validation Enabledtoggle andEnforce On Windowsand/orEnforce On macOS
.png)
Enter the
Common Name Filteryou have selectedPaste the issuing certificate contents into the
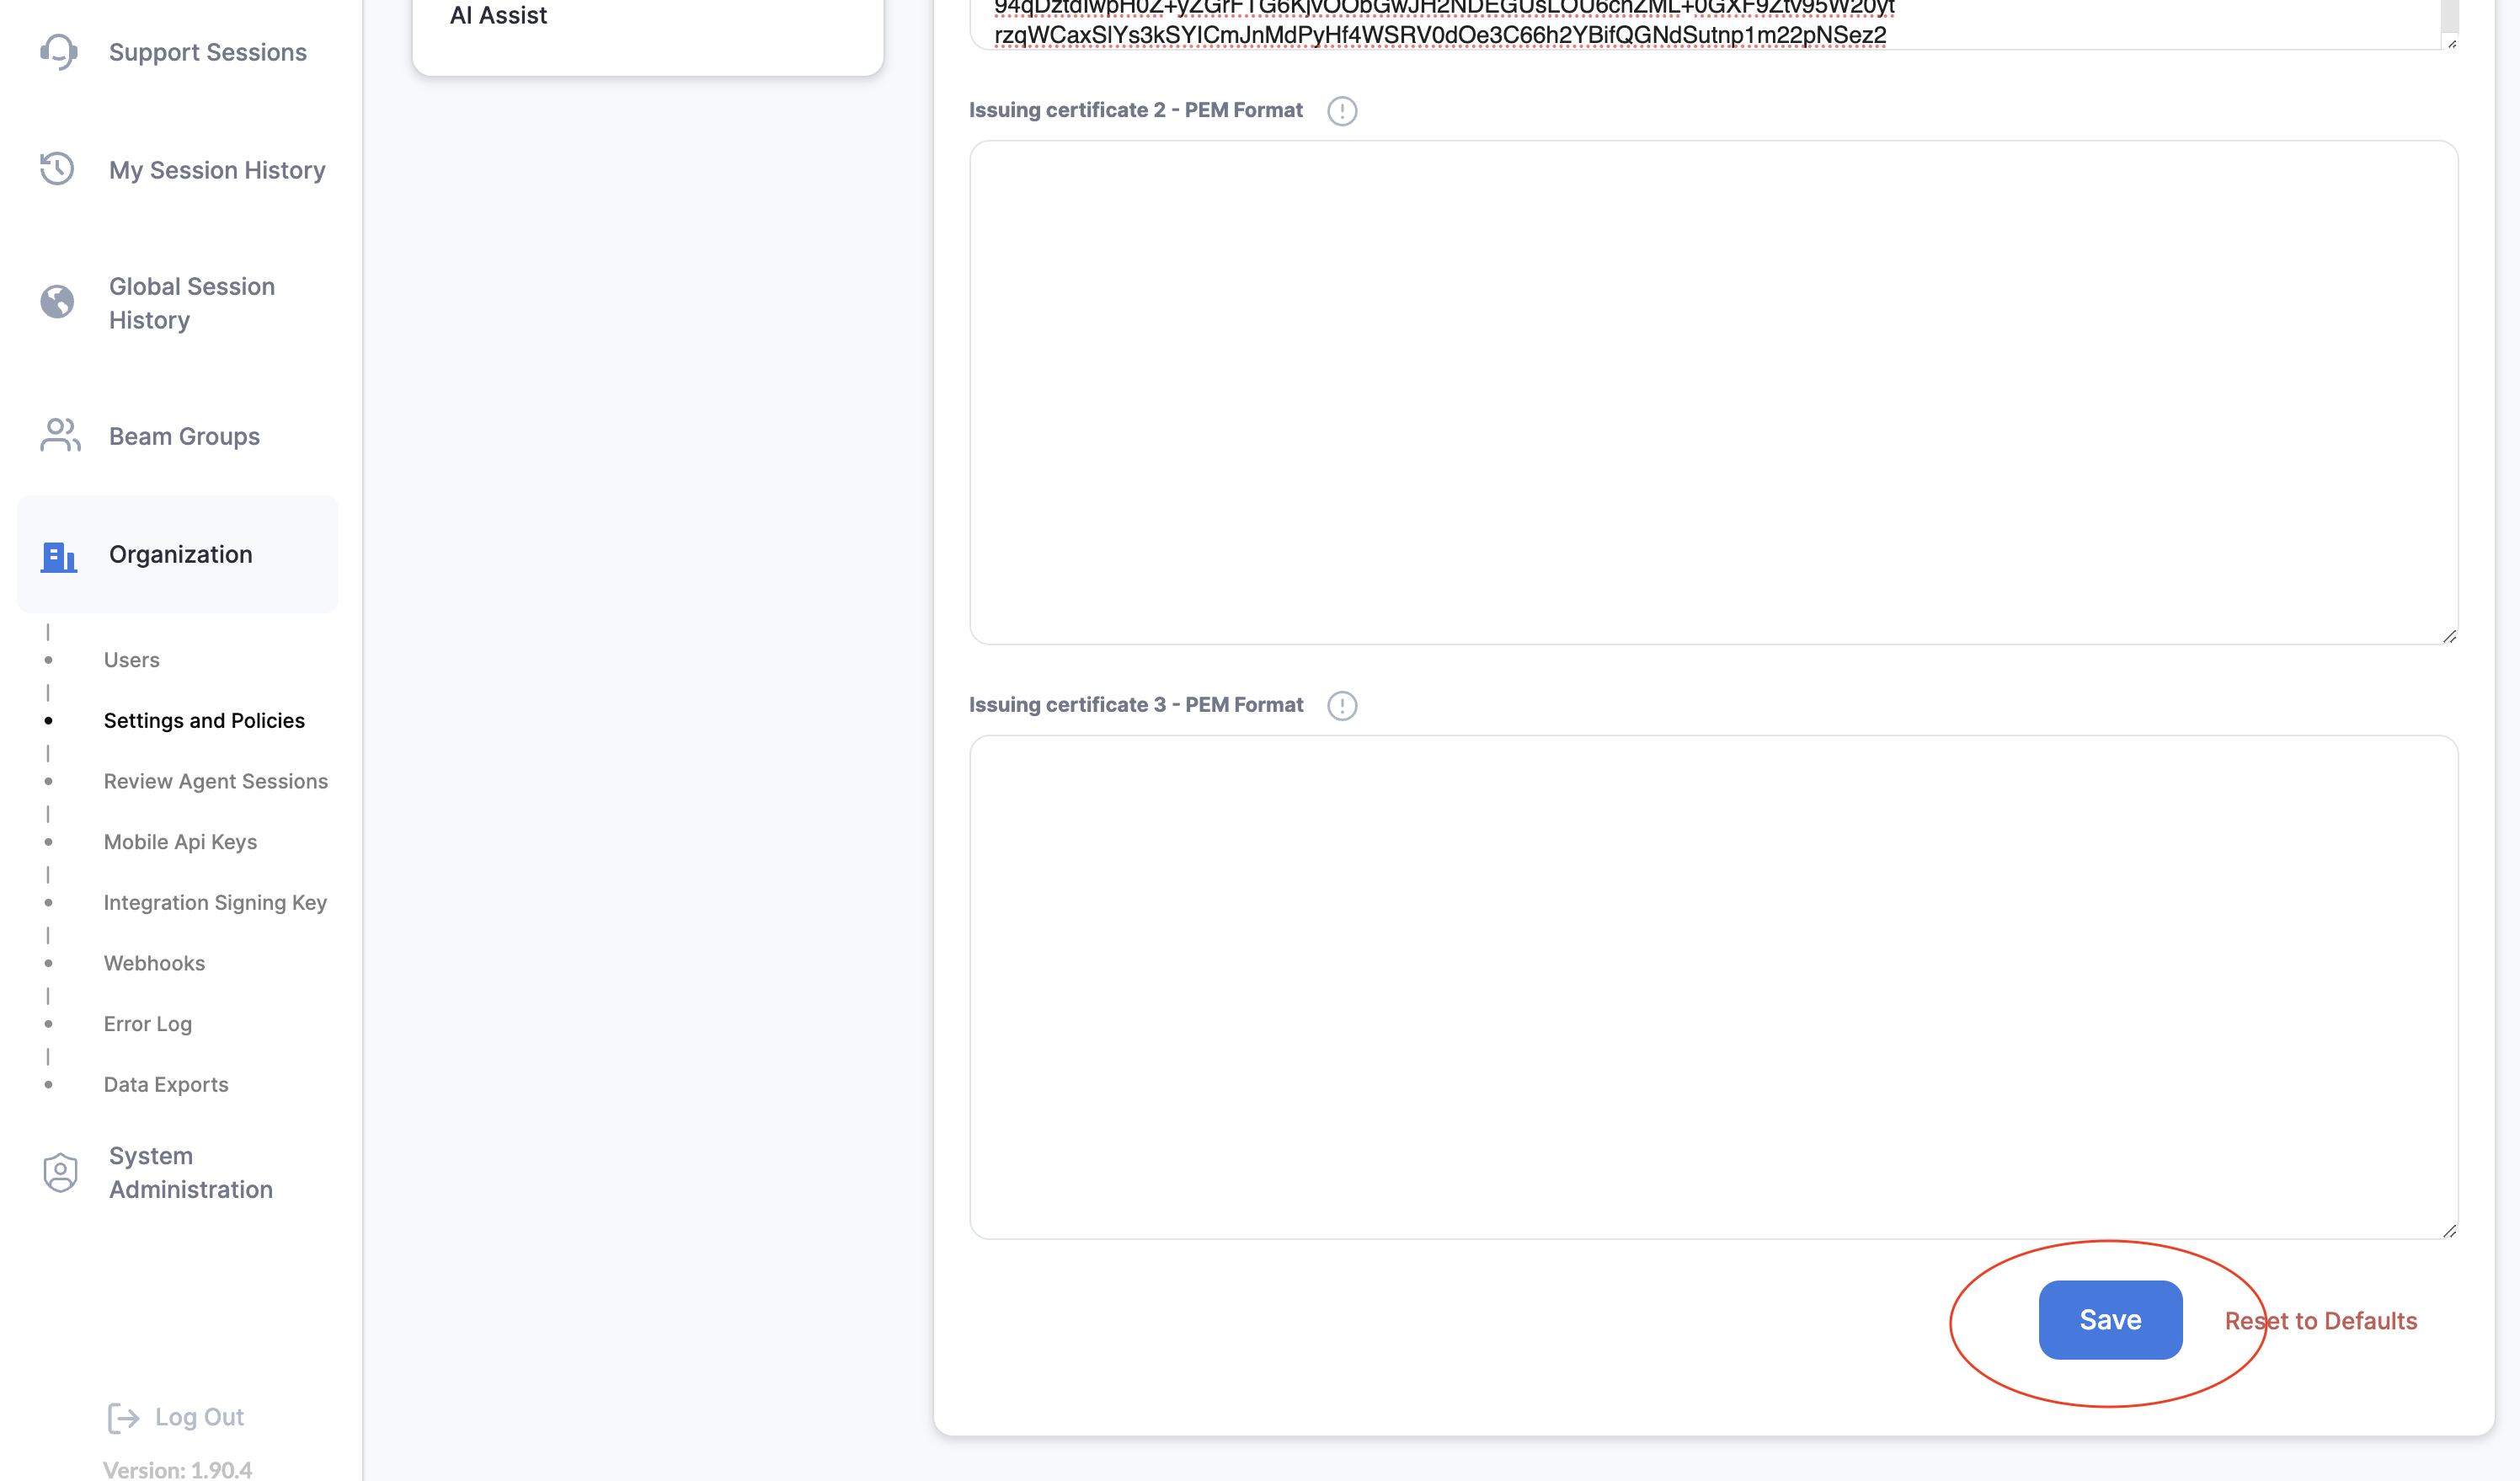
Issuing certificate 1 - PEM Formatfield
Click the
Savebutton to save your configuration
Error Codes
If validation fails during a connection from a managed device, the end-user will receive one of the following error codes:
Code | Meaning |
|---|---|
4043 | The device certificate was not properly installed. A fitting certificate was not found on the device. |
4044 | The certificate is either malformed or invalid. |