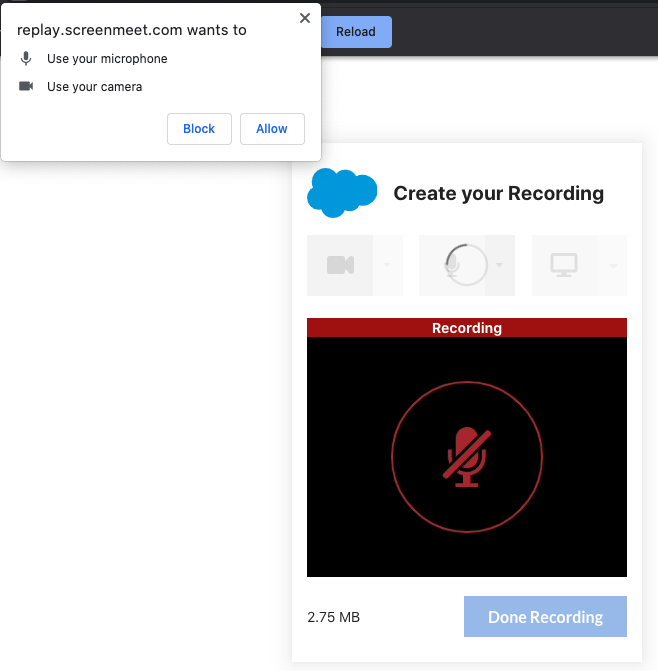
Listed below is the interface that the end user will see upon clicking on the link.
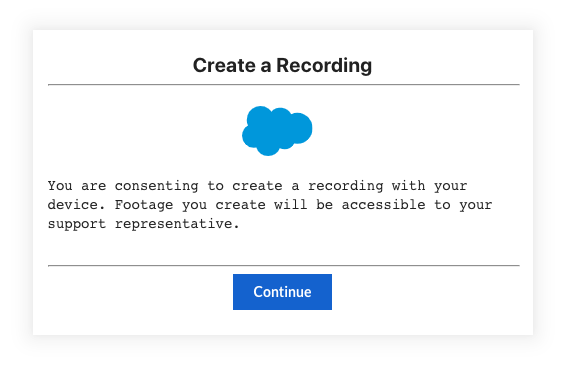
After going to the Unique URL provided, end user will need to consent to create a recording.
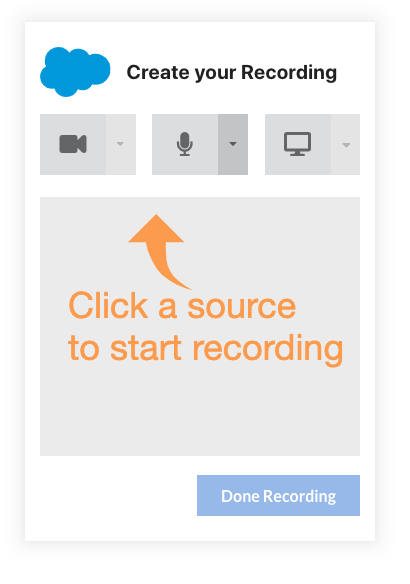
From there, End User can create their replay recording from 3 sources. You can choose 1 or up to all 3 :
- Camera Video Stream
- Audio
- Screenshare (Share your entire screen, application window or browser tab)
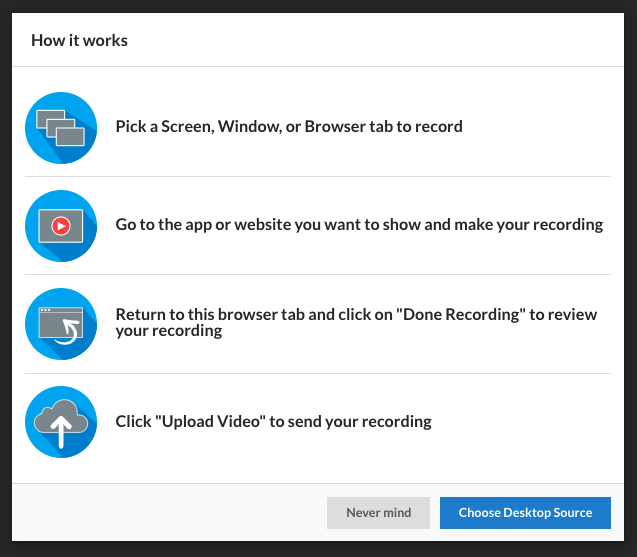
The end user will be prompted on steps to create a replay recording and send back the recording
- Pick a Screen, Application Window or Browser tab to record
- Go to the application or website you want to show and make your recording
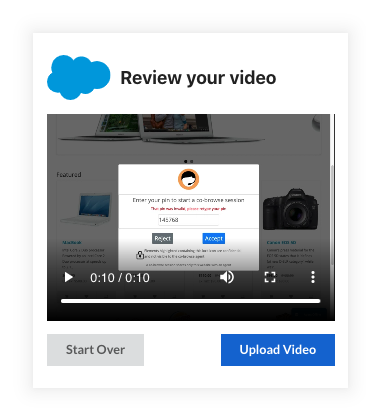
- Return to this browser tab and click on "Done Recording" to review your Recording
- Click "Upload Video" to send your recording
*Depending on your Browser permissions, you may be prompted to grant access to use your microphone and camera.
When done, select, 'Upload Video' to send the recording to the support agent.
After uploading, end user will be prompted a confirmation that the 'Recording Submitted Successfully'.
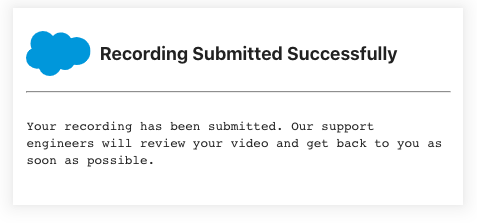
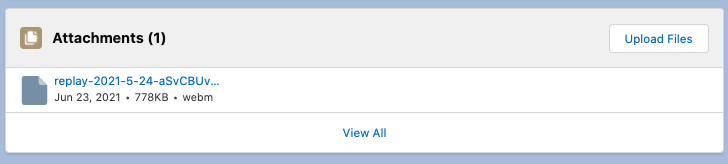
The Support Agent can retrieve the recording directly from the case attachment on their CRM platform.